
Are you excited about making perler bead designs with your kids but aren’t sure how to iron perler beads? As long as you follow a few simple instructions your perler bead creations will be a success!
This site contains affiliate links. If you make a purchase using one of these links, I may earn a commission. Please visit my disclaimer page for more information about cookies collected and our privacy policy.
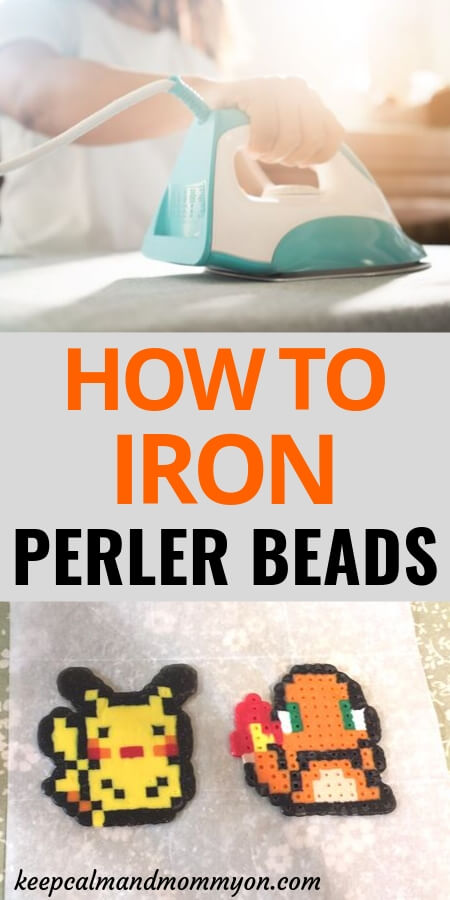
How to Iron Perler Beads
Perler beads are so much fun! My kids love to make perler bead designs. They will literally sit for hours placing those tiny little beads on peg boards to create really amazing things!
How to Make Perler Beads
If you’ve never made perler beads before then you need to start by getting together everything you need.
You will need a peg board to design your perler beads on. And you will need the actual perler beads that are made specifically for this project.
Then it’s time to start creating!
You can search for many different perler bead designs.
Perler beads can be made for any topic and any holiday! Some of the perler beads we have made are Minecraft Perler Beads, Perler Bead Magnets, Halloween Perler Beads, Autumn Perler Beads, and Easter Perler Beads!
The sky is the limit! You can find perler bead patterns for almost anything!
Creating is a lot of fun. It’s a great way to spend time with your kids and a great way for them to learn. Making perler beads helps to strengthen fine motor skills and increases concentration and focus.
But what do you do once your creations are done? How do you take those individual beads and turn them into a solid design?
You need to iron them!
However there are a few things to consider first when ironing perler beads.
How to Iron Perler Beads Perfectly
You can watch exactly how to iron perler beads in the above video, and read the steps below for details.
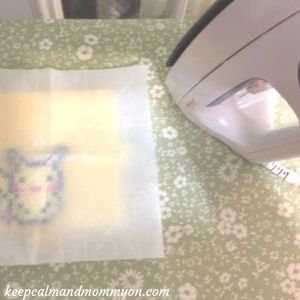
While your perler bead creation is on the peg board you want to carry it to your ironing board. Lay it down and place a sheet of parchment paper over it.
Next take your hot iron and lightly press it onto the parchment paper covered perler beads. Don’t hold it too long. Pick it up, reposition, and lightly press again.
Now, you don’t want to iron for too long or the beads will melt more than you’d like them to. But you need to iron it long enough that the beads fuse together.
Some prefer to melt the perler beads so that you cannot see the openings in the beads. Some prefer to iron them just enough so that they are together, but so that you can also still see the individual beads.
I personally like the look of being able to see the individual beads, but my kids like it to be melted enough that you can’t see the holes.
Can You Iron Perler Beads With Wax Paper?
The Answer is NO!
You need to use parchment paper. I learned this lesson the hard way.
Wax paper will stick to the perler beads and does not come off easily! If you’ve already done this and need to know how to remove the wax paper, the easiest way I have found is with water. Run your finished perler bead creation under running water and rub the wax paper off.
However, this can be easily avoided by using parchment paper!
Another important thing to consider when ironing your perler beads is that the iron should not touch any of the parts of the peg board that do not have beads on it. Otherwise you risk melting the plastic peg board. Don’t ask me how I know this;)
Once you have melted the beads together you can peel the beads along with the parchment paper off of the peg board. Lay the parchment paper side down on the ironing board and cover the exposed side of the perler bead design with another sheet of parchment paper. It should be sandwiched now between two parchment paper sheets.
Now you are going to repeat the first step and iron the other side of the perler beads until they have reached the desired texture and are completely fused together on both sides.
After ironing there is one more important step that you must do!
This step will prevent the perler bead creation from warping.
You want to take a very heavy book and lay it on top of the parchment paper covered perler beads. Leave the book in place until the perler beads have cooled.
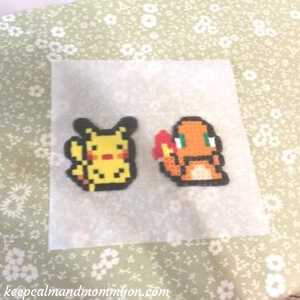
Once cooled remove the book and peel away the parchment paper from both sides of the perler beads.
How to Iron Perler Beads
You now have an awesome perler bead creation! Your child can now play with them, or you can use them to decorate your fridge:)
If you’d like to use them on your fridge as magnets then be sure to read How to Make Perler Bead Magnets.
And that is how you iron perler beads!
It really is very simple, but if you don’t follow these simple instructions your perler beads will not turn out well.
I hope you and your kids enjoy making perler bead creations as much as we do!

I made a charmander and it turned out great
You never said what temperature setting for the iron should be.