Are you looking for fun and stimulating sensory bottles to make for your child? Shell and glitter sensory bottles are a great way to incorporate sensory stimulation into your child’s play!
This site contains affiliate links. If you make a purchase using one of these links, I may earn a commission. Please visit my disclaimer page for more information about cookies collected and our privacy policy.
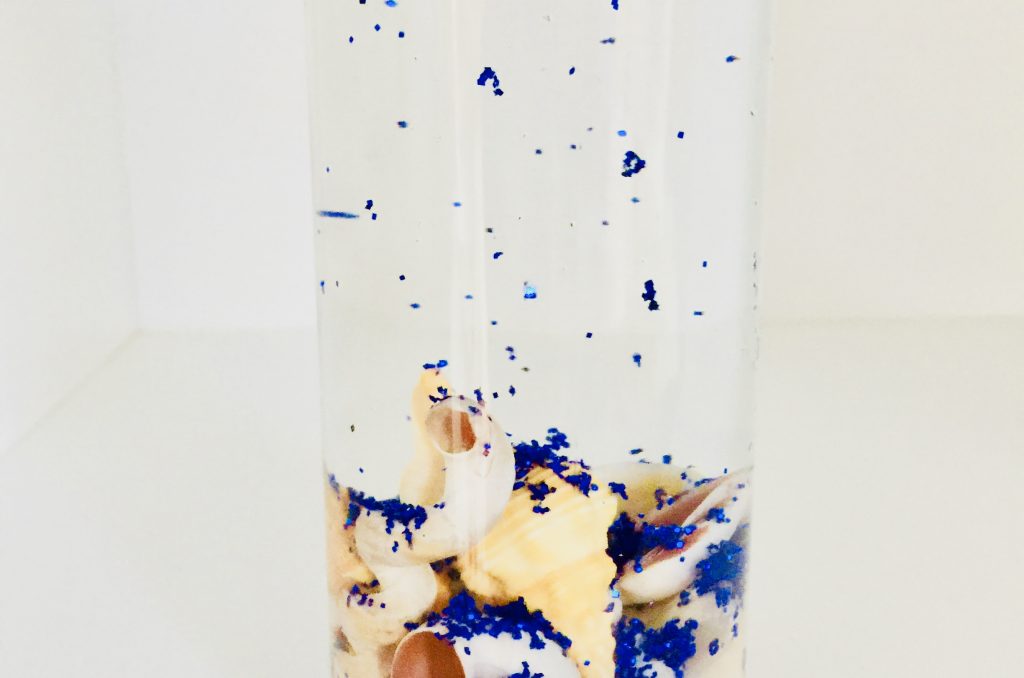
Shell and Glitter Sensory Bottles!
Our sensory creations started with us making sensory bins.
We have made everything from the Vegetable Garden Sensory Bin to the Moana Sensory Bin.
They are all a big hit with my kids! They love not only playing with them but helping me assemble them as well.
Sensory Bottles
This got me to thinking that it would be nice to have sensory activities that the kids could use not only at home, but while traveling and in the car as well!
So we created sensory bottles!
I think that sensory bottles will be a great addition to our Sensory Toy Bag for traveling!
Sensory Glitter Bottles
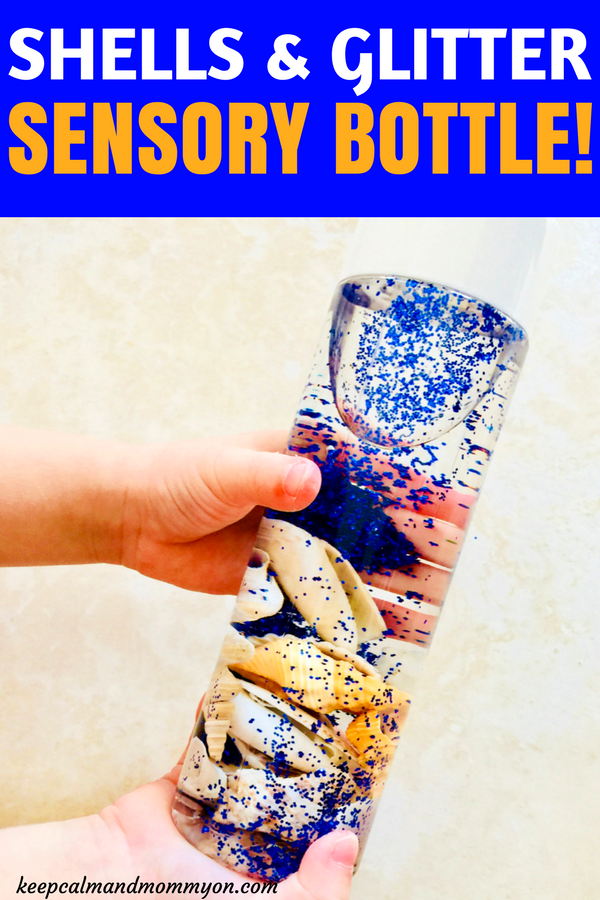
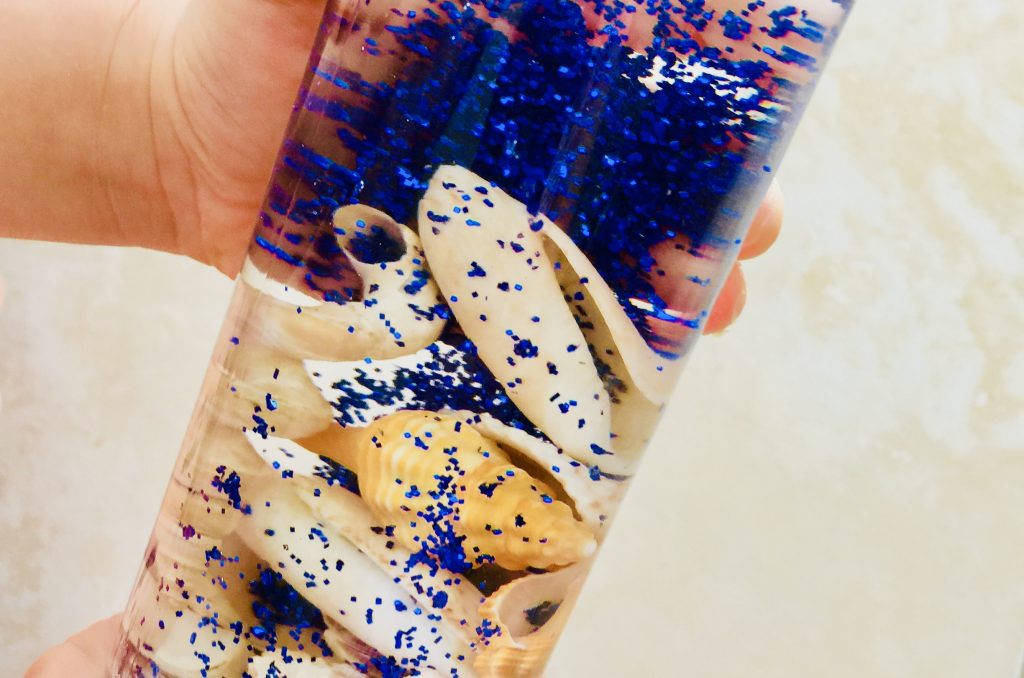
One of the first sensory bottles that we created was the shell and glitter sensory bottle!
It’s one of my children’s favorites!
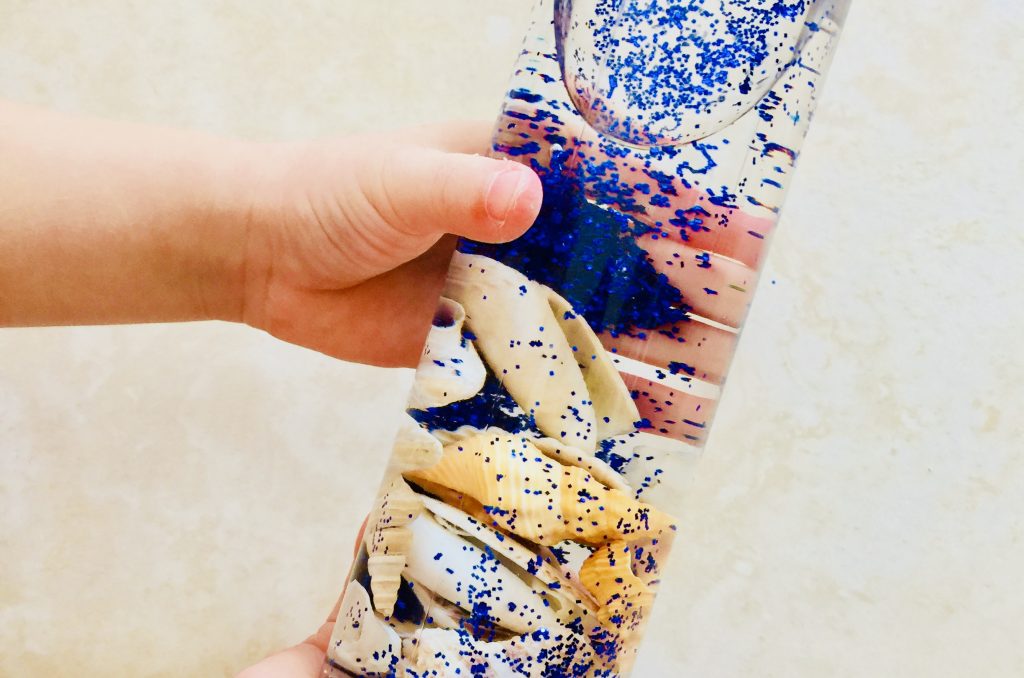
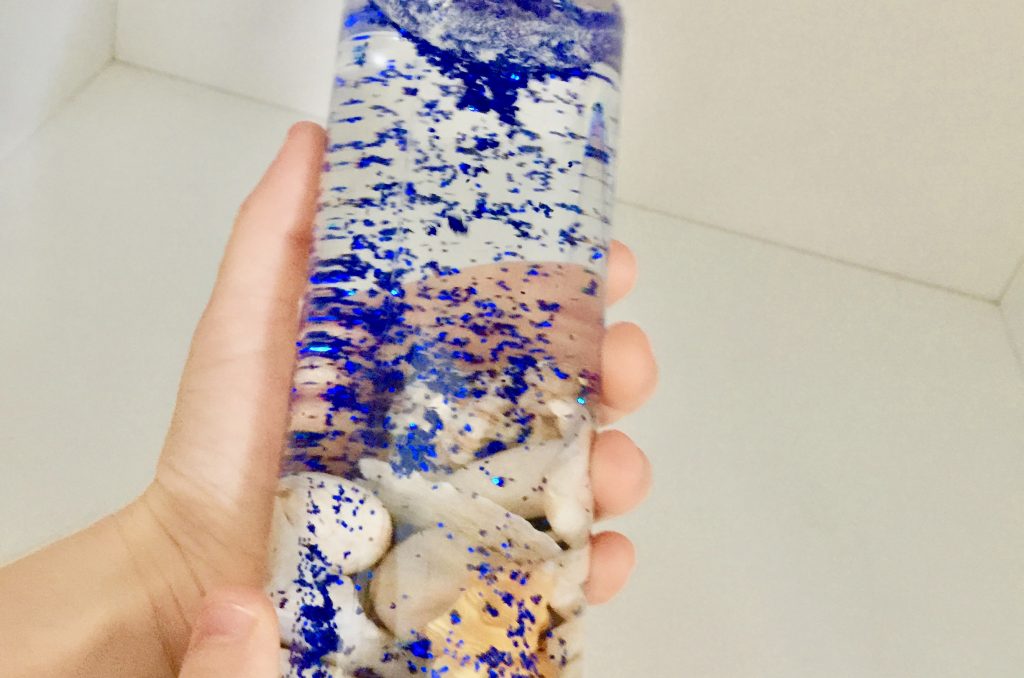
The feel of the water and shells moving through the bottle is very soothing and calming.
And the colorful blue glitter adds fun and color to the sensory bottle:)
How To Make Sensory Bottles
Another great thing about sensory bottles is that they are so easy to make!
Shell and glitter sensory bottles take less than five minutes to assemble!
That’s right, five minutes to make something that will not only be fun and beneficial for your children, but that will give you peace and quiet in the car! 😉
Totally worth it! lol
To make shell and glitter sensory bottles you will need:
Small Shells (they have to be small to fit in the neck of the bottle)
Water
And thats it! These were all items that we already had on hand so assembly was easy peasy:)
Glitter Sensory Bottle
First add the shells to your bottle.
You want to make sure that you have enough shells for the bottle to be fun, but not so many that they can’t move in the bottle freely.
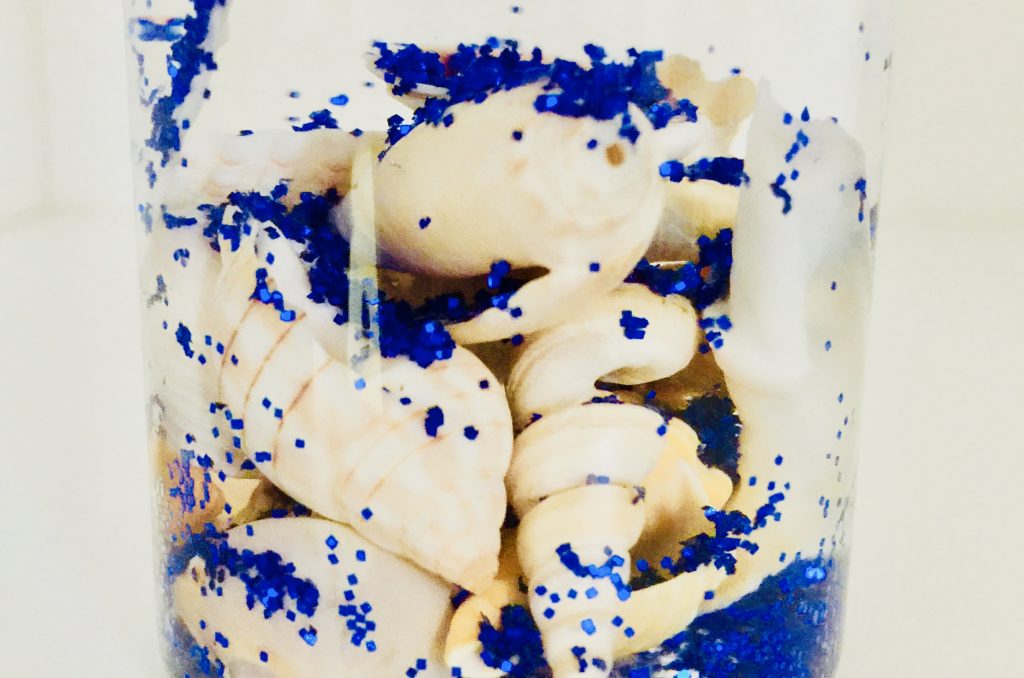
We added about 15 different shells to our bottle.
And be sure to use a variety of shell shapes and colors!
We used long shells, round shells, white shells, and orange colored shells.
You can either use shells that you gathered yourself on a trip to the beach, or if you don’t live near the beach you can find sea shells here.
We used some of the same shells that we used in our Day At The Beach Sensory Bin.
You also want to make sure that your shells are small because the openings of the sensory bottles are not very big.
If you want to use larger shells you will need to find a bottle with a larger opening.
But you really don’t want shells that are that big anyways so that you can fit enough in the bottle and so that they can move freely.
Sensory Bottle Glitter
Next add the glitter to your shell and glitter sensory bottles!
I added about 3/4 of a teaspoon of glitter to our bottle.
But feel free to add as much as you would like.
We used blue glitter, but any color will work. If you have a different color on hand, use that!
Gold or silver would be really pretty as well! Kids love bright colors so any color will work:)
Sensory Water Bottles
The last item to add to your bottle is water.
Simply fill the bottle up with water and screw on the lid.
And now your shell and glitter sensory bottle is complete!
Wasn’t that incredibly easy?!
And isn’t it so pretty?
Like I mentioned above, the feel of the shells and water sloshing through the bottle is very therapeutic.
For me it has the same effect as a stress relief ball!
Even my oldest son really liked this one! He has a mild case of Tourette’s Syndrome and sensory toys and items are really beneficial for him.
You can read more about that in my post 10 Must-Have Sensory Toys For Kids!
I hope you and your child enjoy the shell and glitter sensory bottle as much as we do!